Combat in The Captain is optional. You can complete the game without ever fighting or firing a single laser.
However, fighting gives you more options when it comes to decision making, such as deciding whether to fight your way through to Earth or having to go the Smuggler's Route. You can also get enough money for engine upgrades without having to make morally compromising decisions (ie. stealing to earn money).
Listening to Ship's explanation of the Battle Simulator is essential for getting used to combat, but here are some tips to help you get started and perhaps find a way to improve your existing knowledge.
- Advertisement -
<?XML:NAMESPACE PREFIX = "[default] http://www.w3.org/2000/svg" NS = "http://www.w3.org/2000/svg" />
Click On Your Opponent To Learn More Information
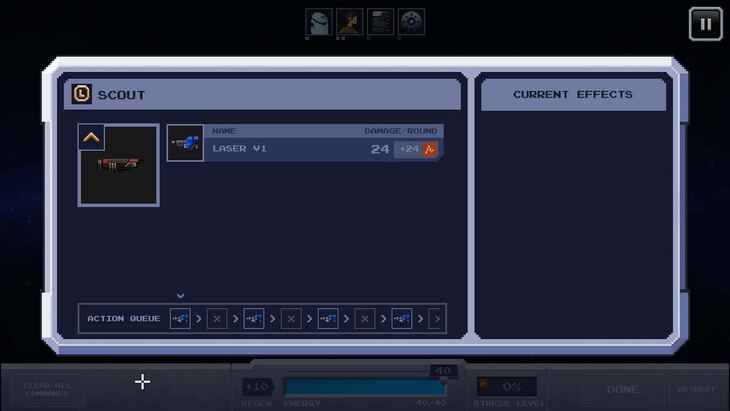
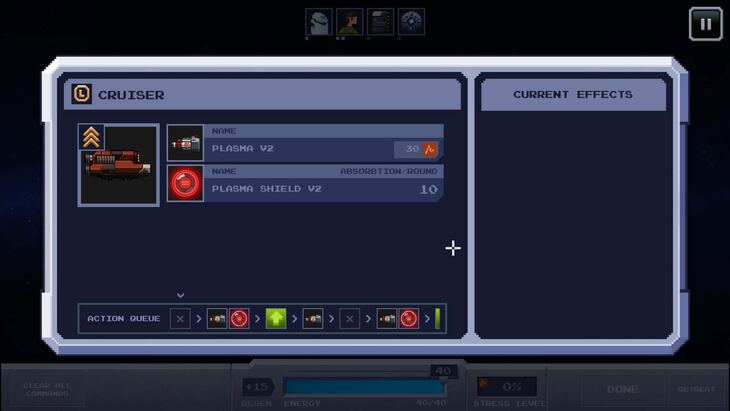
When fighting, you can always check out your opponent's information by clicking on them.
You can see what equipment your opponents have (in this example, they have 1 laser), as well as the damage and effects they can do. At the bottom, you can see what actions your opponents will take every turn. An X means no action is taken, but otherwise you can see an icon which indicates what they will do.
Use this to decide when you should throw up a shield, when you should fight, or deploy countermeasures. Properly reading your opponent's moves will help to avoid mistakes or unexpected combat situations.
Going With Lasers Is A Good Option
Your default weapons come with Lasers or Plasma. Lasers will directly affect a ship's hull, while Plasma affects a ship's stress levels.
Your lasers can be better early on for defeating enemies, and they can also stun your enemies, giving you more time to react. While there are different weapons and some plasma strategies can be effective, don't be afraid to sell your plasma weapons if you need more money.
Fight Often, But Retreat When Necessary
You don't have to fight enemies all at once. If you need to, retreat and fix your ship up at a merchant stop.
All enemy configurations can be beaten, but some can be very difficult to overcome, especially if you've been through a few fights.
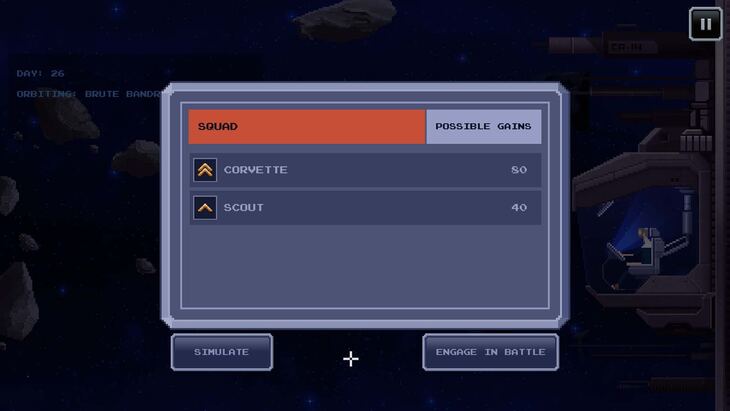 No shame in retreating if you can't win.
Rather than push yourself, spend some time repairing your hull and getting better equipment. It's better to arm up now than it is to push yourself and make costly mistakes.
Get A Power Generator, Then Increase Your Battery
Getting more power early on is fantastic. You can easily start shooting lasers more often and your battery will be able to keep up.
As you start going into more combat situations though, you may want to start increasing your battery size more, since the beginning of a battle starts to become more important as the fights get more advanced.
Power generation will always be useful, but starting with 80 Energy and taking full advantage of it is better than starting at 60 Energy and never being able to utilize your weapons and shields to their full potential.
Don't Be Afraid To Boost Shields
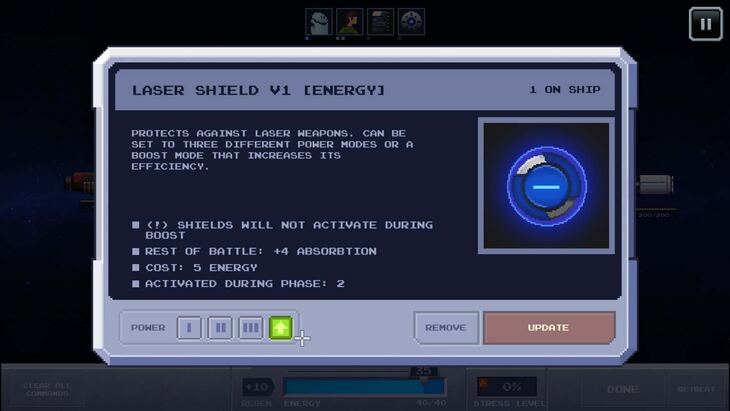
Boosting your shields with the green button can seem like a wasted action, especially if your shields don't seem to hold up against the enemy's attacks.
Fortunately, boosting your shields makes them a little stronger for the next round, and the effects last until the end of the battle. It can make a difference in the early fights as it protects you against attacks that would normally take up a lot of your HP.
It is still useful later on, but you should have more offensive tools to deal with enemies quickly rather than go into long fights.
Unique Battles
Outer League Territory 1
The Outer League focuses a lot on laser damage. Prepare your laser shields and start getting used to boosting your shields in the downtime while you focus on looking at your opponent's action queues and decide who is more important to pick off.
The boss of Outer League Territory #1 is Brute Bandreek, and he comes with a Scout ship.
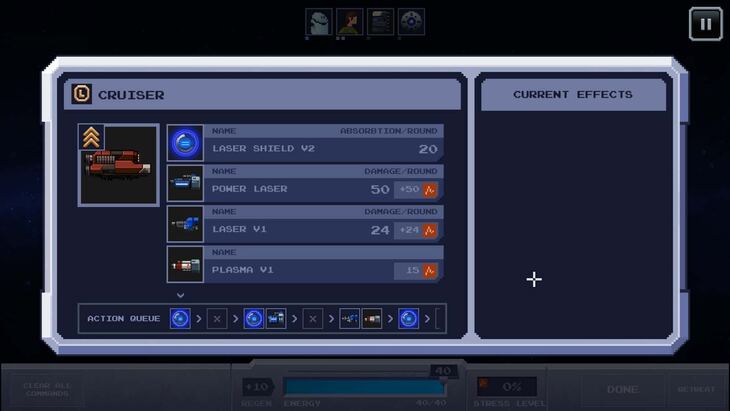
Brute can hit you hard with his Power Laser, which deals 50 Laser damage. His regular laser is more manageable at 24 damage, while his Plasma attacks won't be much of a threat as long as you don't stay defensive.
Make sure you get rid of the Scout ASAP to focus solely on the Cruiser. Attack when the shields are down and boost your shield to better withstand the Power Laser or it could be a quick fight.
Upgrading your Lasers or Laser Shield can help considerably in this battle. If you took a quick break to repair and heal, you shouldn't struggle too much in this battle.
Defeating the brute lets you choose between 36 precious metals or E-Capsule Converter, which can use an energy capsule for -20 stress or 30 energy, latter being available once per battle.
Outer League Territory 2
The second Outer League Territory focuses on Plasma damage. As a result, hull durability isn't as important since none of them can target it. It's possible to win the entire area with only 1 Hull point remaining!
Since Stress damage resets to 0% every fight, you don't have to worry about healing every battle. That doesn't mean ignore the enemy's attacks, but taking 1 Plasma attack isn't the end of the world. Remember to check enemy equipment though; a few enemies carry either rockets or lasers that you want to remove ASAP.
Get used to defending and as always, prioritizing enemies to defeat. Your Plasma Shield will still be useful for survival.
The boss of Outer League Territory #2 is Rikko Red, and comes with a Scout and Corvette.
The Scout and Corvette come with the usual Plasma weapons and shields, but be careful of Rikko, who can boost the power of their Plasma every few turns. This can quickly spiral out of control, and you may want to target Rikko first.
Once Rikko is down, upgrading your Plasma shields will be a more viable strategy and you can easily upgrade your shields out of the damage range of the Scout and Corvette. You can then pick them off one by one.
Rikko is known for dropping the Gamma Gun after the battle, and you can either choose it or give it up for Precious Metals.
Jannet Pack
Jannet Pack is an optional encounter. Clear out Bourke's Tradeverse and speak with the owner about their trade dealings. You can then offer to help them with Jannet in exchange for 1 free item in the store.
Buying some countermeasures for Jannet would be a good idea. Rockets can't be stopped by Laser or Plasma shields, but countermeasures can intercept rockets before they hit you.
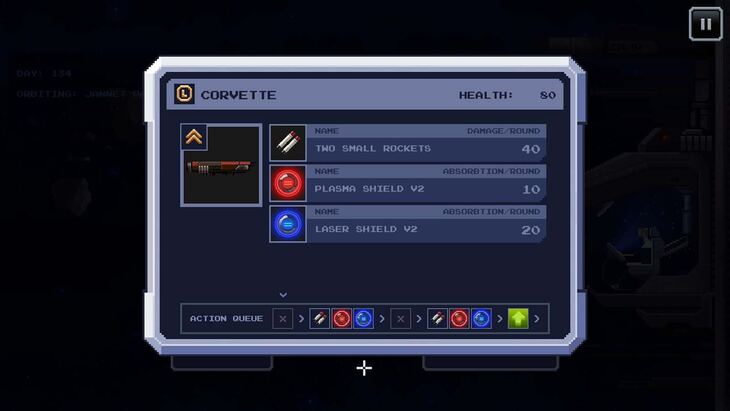
Jannet comes with two Scouts. Her only method of attack will be firing two rockets at once. You need 2 countermeasures to fully avoid the damage. Both Scouts will also use rockets, and you need to watch out for those as well.
Taking down Jannet makes the battle significantly easier, since you have less rockets to deal with and easier targets to take down. Since you are unlikely to have enough countermeasures to take care of all the rockets, dealing with Jannet first allows you to deal with the rockets used by the Scouts.
You can either take the 30 Spike Crystals back to Bourke's Tradeverse or you can grab an Engine V2 upgrade if you haven't already gotten it.
Scavenger Territory
You will now be going up against ships that have rockets along with their usual arsenal of attacks. If you haven't already upgraded your weapons, now is the time to do so. Upgrading your shields would not be a bad option either.
Make sure you have purchased countermeasures, especially from the nearby Lymian Trade Atoll or you could be in for a world of hurt, taking rocket damage that can really add up.
You will now have 3-4 enemies to deal with at a time, make sure you are looking at enemy information and planning your moves. Strategizing and thinking ahead will be very important.
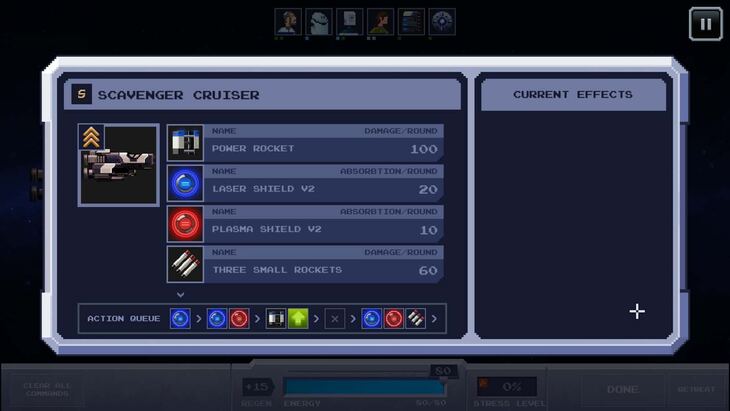
The boss of this area is Bog 'Grandpa' Voltarwal, Like Jannet, his only offense consists of rockets. Unlike Jannet, he has a Power Rocket which is capable of taking out half of your health in one hit if a countermeasure doesn't draw it away, along with 3 small rockets. Bog can also boost his rocket damage, making this a fight you don't want to drag out.
He comes with a Repair Ship and a Corvette. The Corvette will actually fire 3 small rockets, which can be difficult to manage on top of Bog's rockets.
Bog and the Corvette constantly use Laser and Plasma shields together. If you have the Gamma Gun, you can cut through those shields gradually. The Repair Shield is more vulnerable, but this is also your time to focus on attacking when the shields aren't up.
This may be tricky as those are the times where the enemy is firing back, but you can heal and repair afterwards. Don't forget to use your crew cards as well; they are invaluable tools even if they only have limited uses.
Upgrading your Countermeasure Module will help mitigate and possibly prevent the large amount of rocket damage. Just watch your countermeasure stock; it can drain quickly.
Defeating the captain lets you choose between a star fragment and 52 Precious Metals.
Pirate Territory
The hardest of the 4 orange enemy zones. While they have less health than previous enemies, they have Quantum shields for defense (which can mitigate all damage) while having Laser/Plasma weapons and rockets.
Come prepared with an upgraded Countermeasure Module and lots of countermeasures. If you can, bring a fully upgraded generator and battery to these battles, as well as fully upgraded weapons. Bringing rockets of your own can be a great idea as well.
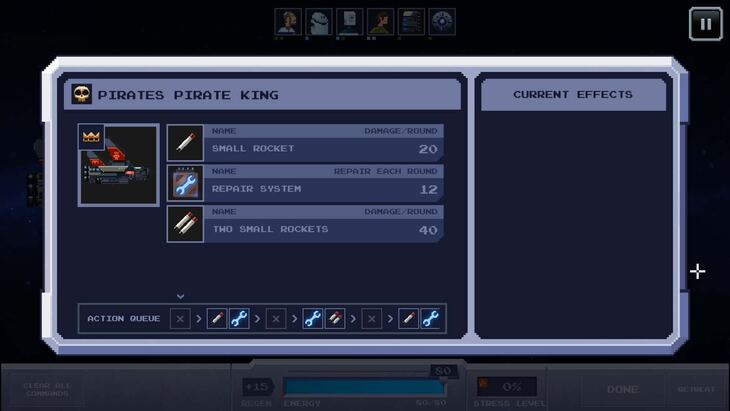
The boss of the Pirate Territory is the Pirate King who comes in with 2 Corvettes. The Corvettes come with rockets and one also has a Plasma attack. The Pirate King can repair his own ship while firing rockets at you.
The toughest part about this battle is the Pirate King's 300 HP, which will be difficult to bring down while managing the other Corvettes. It may be worth using a Nuke to take out the Pirate King, or bring a lot of countermeasures to protect yourself.
Take out the Corvette with the Plasma attack first to only deal with rockets. Then take out the other Corvette to deal with just the Pirate King. As long as you can counter the rockets, the Pirate King will quickly fall.
0 commenti:
Post a Comment